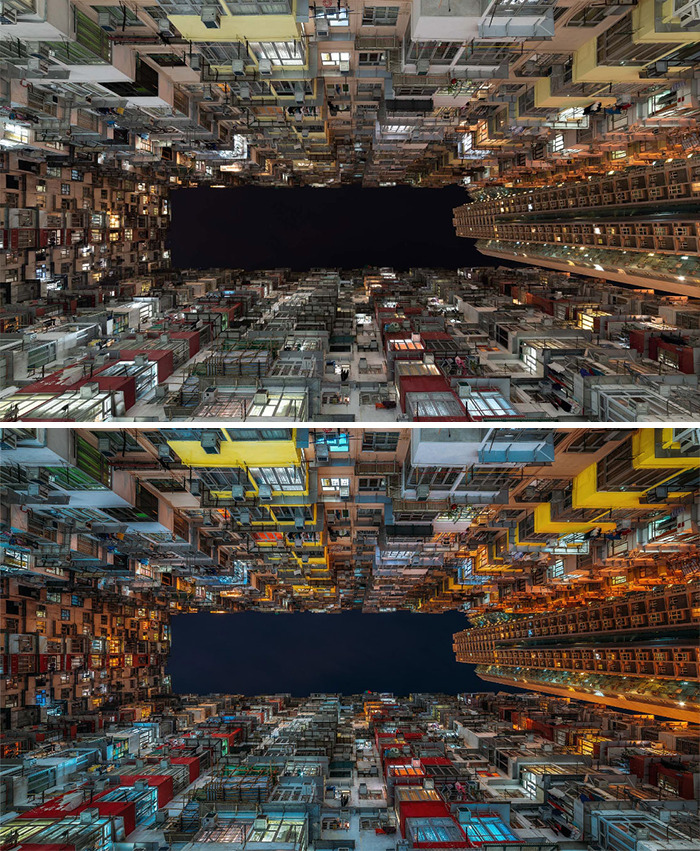
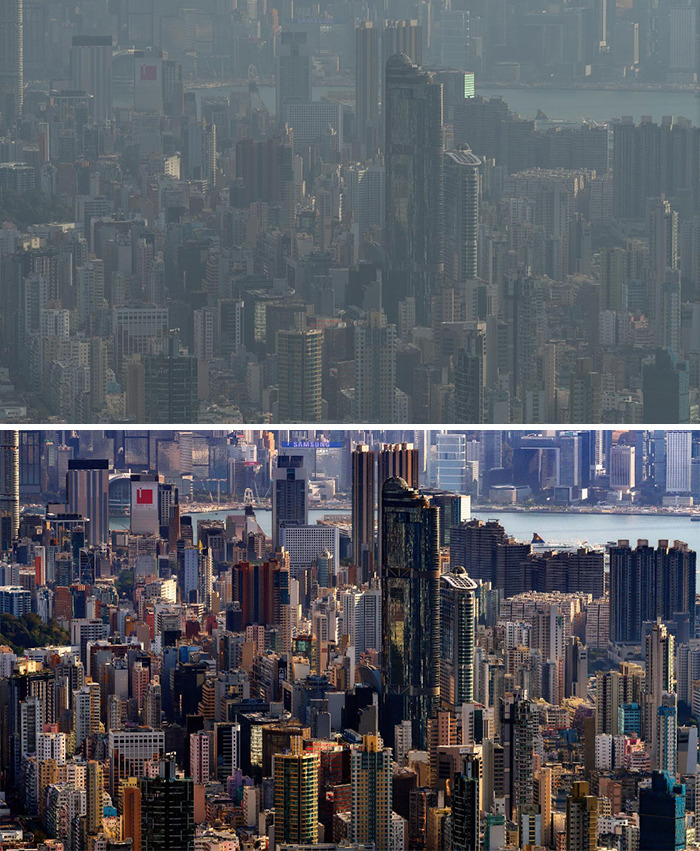
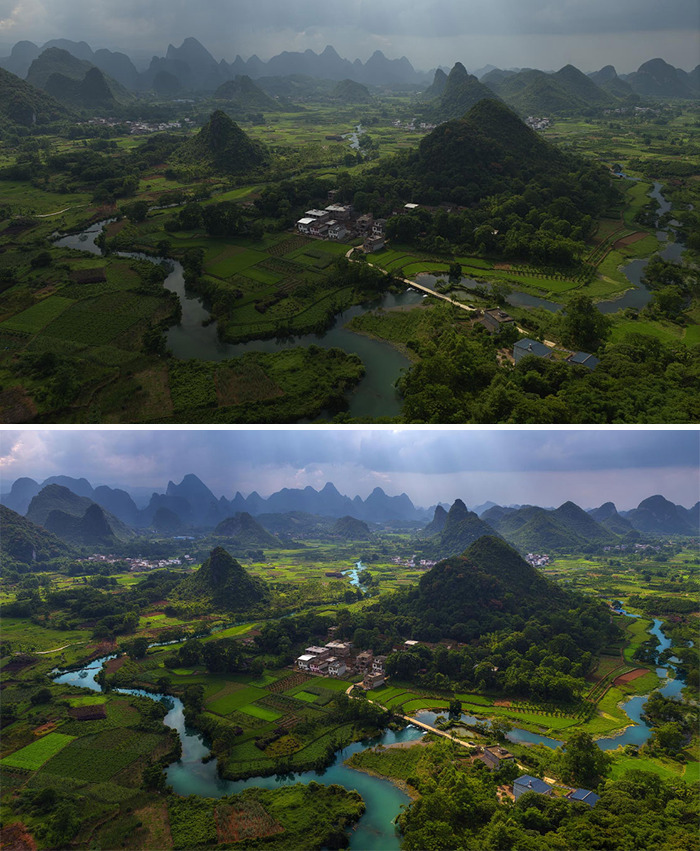
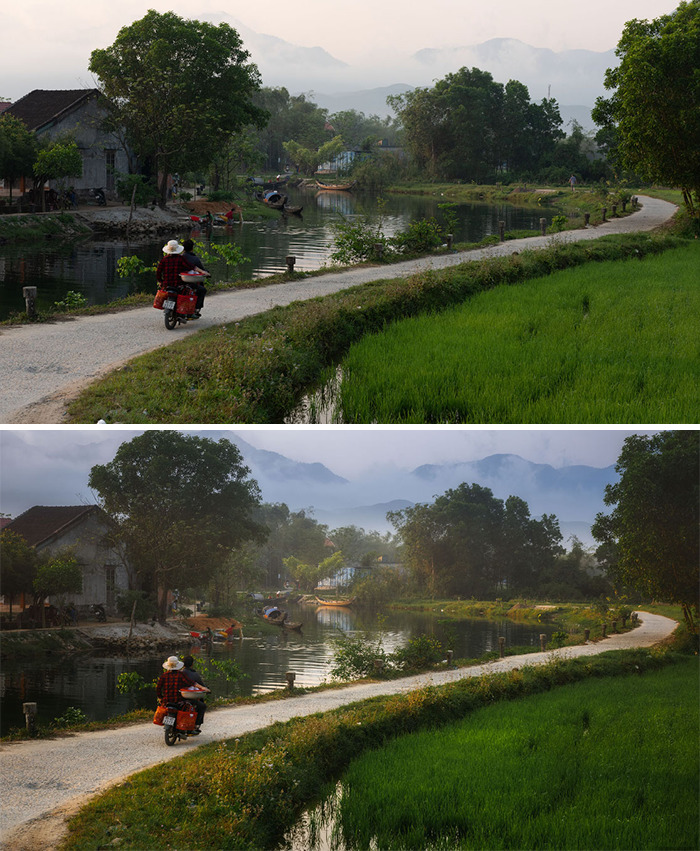
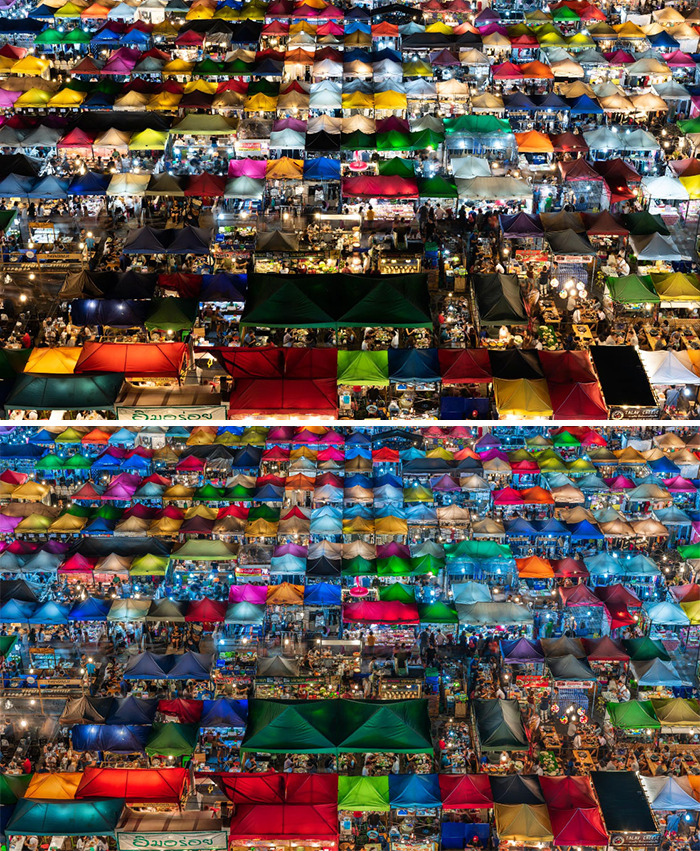
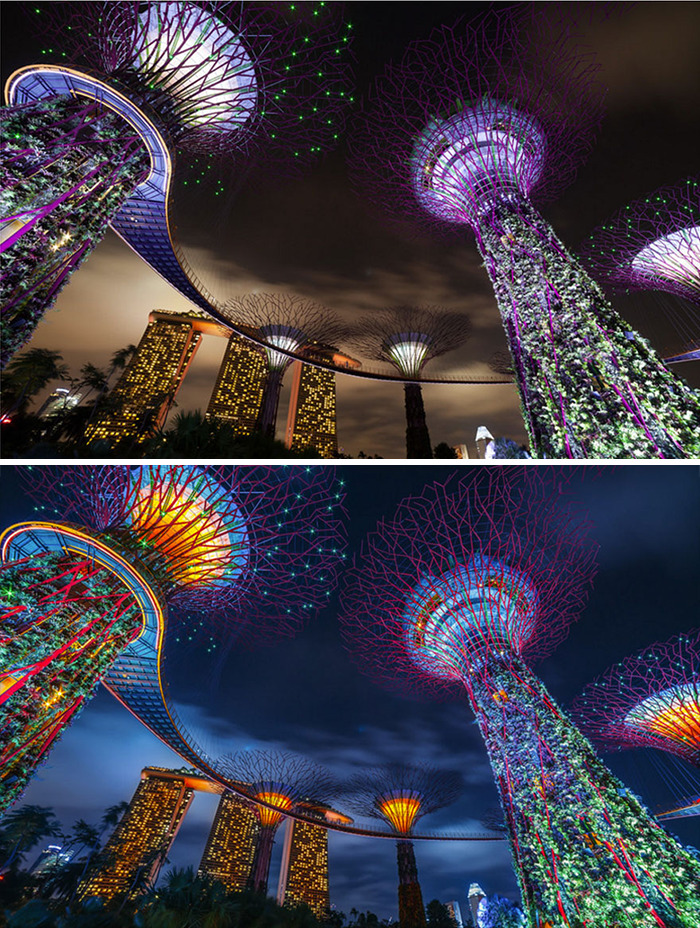
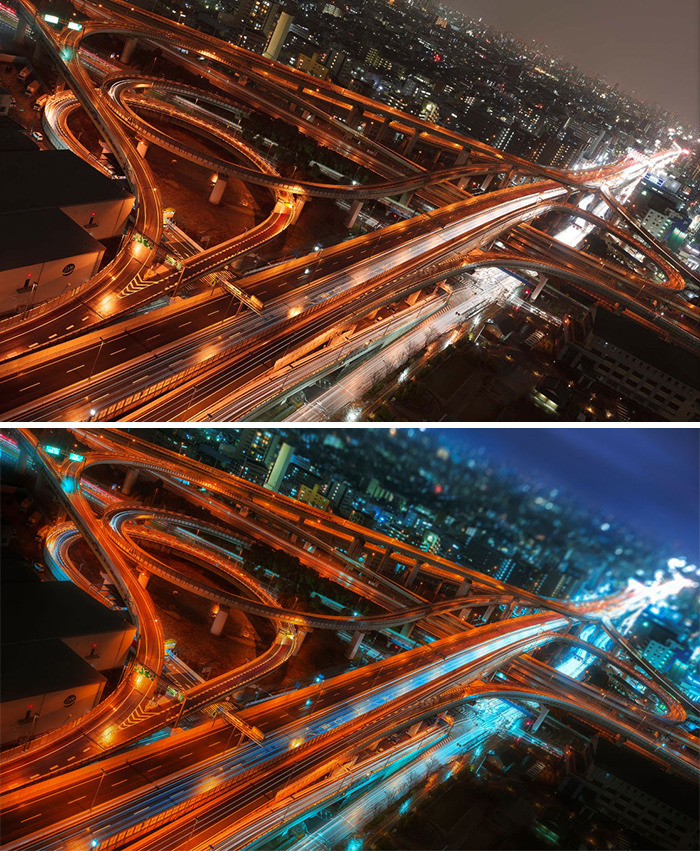
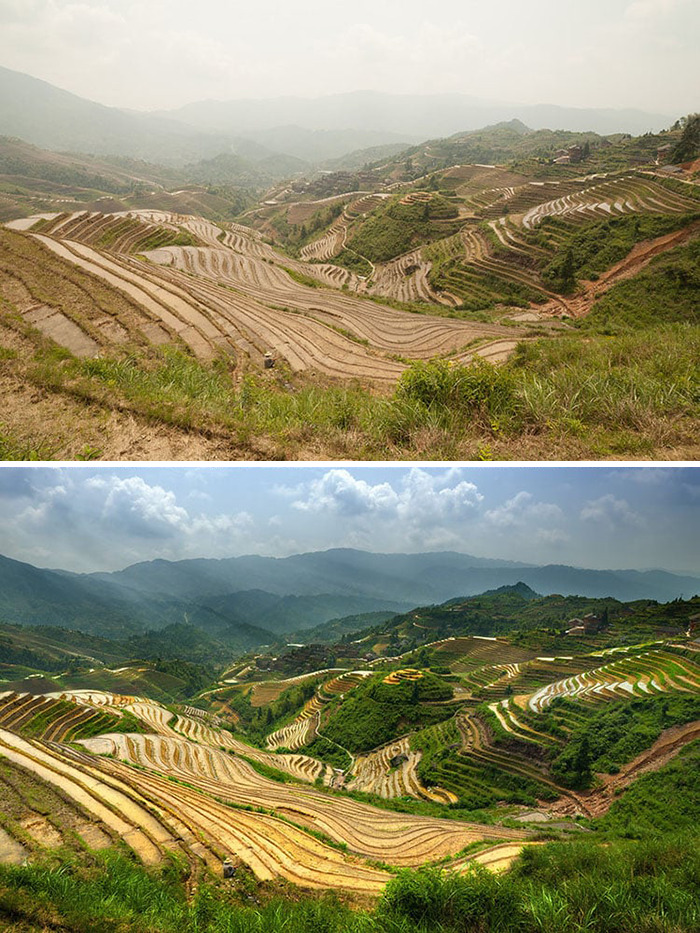
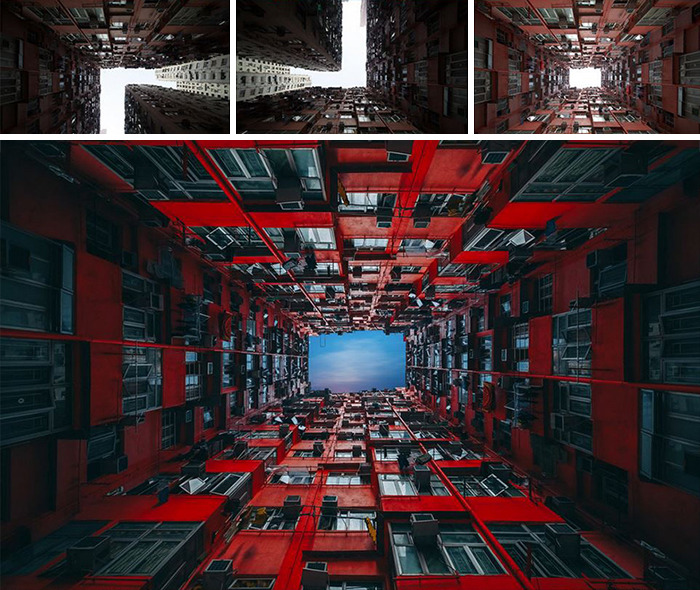
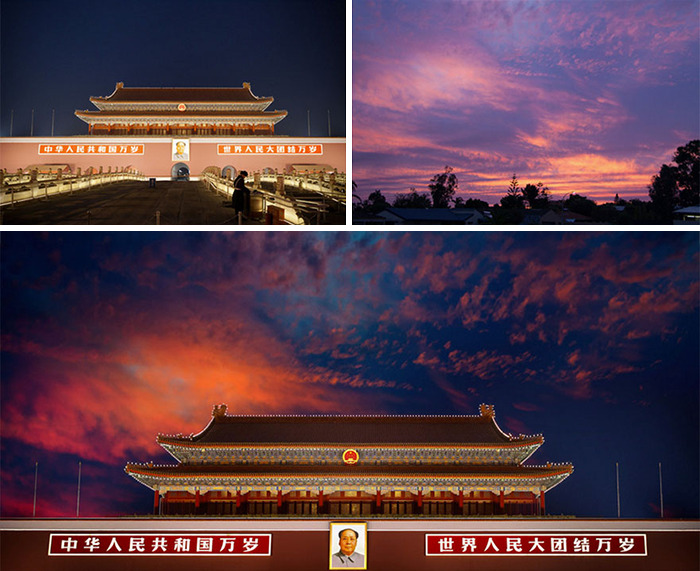
Taking a good picture isn’t easy. Taking an awesome picture is even harder. And taking an impossible picture is, well, impossible. Unless you use Photoshop that is.
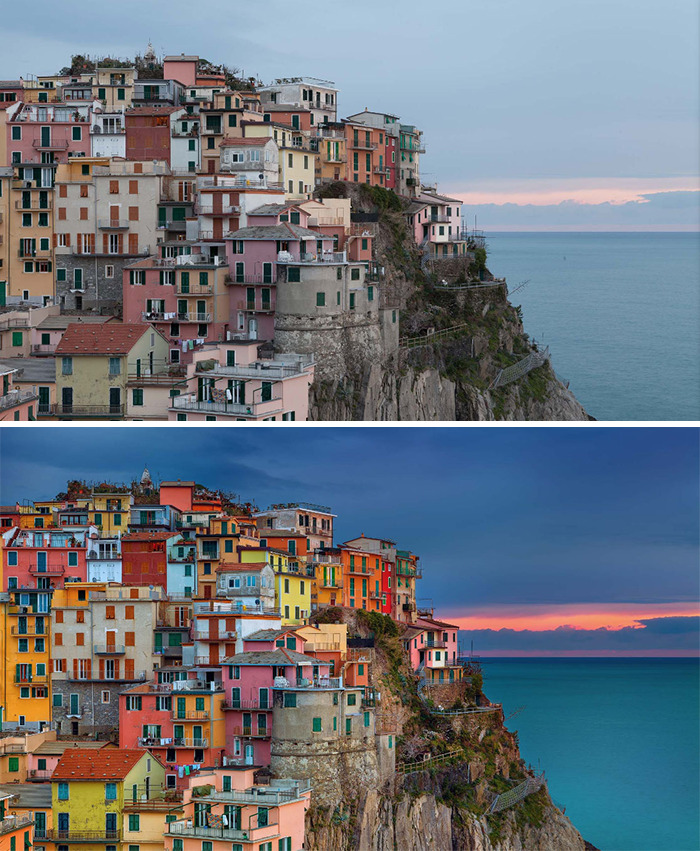
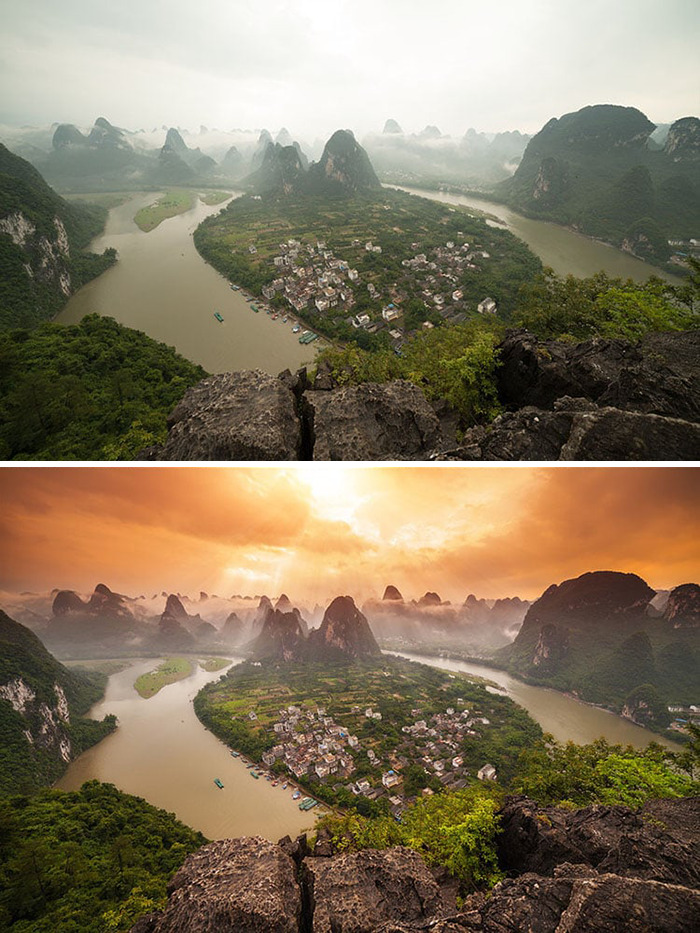
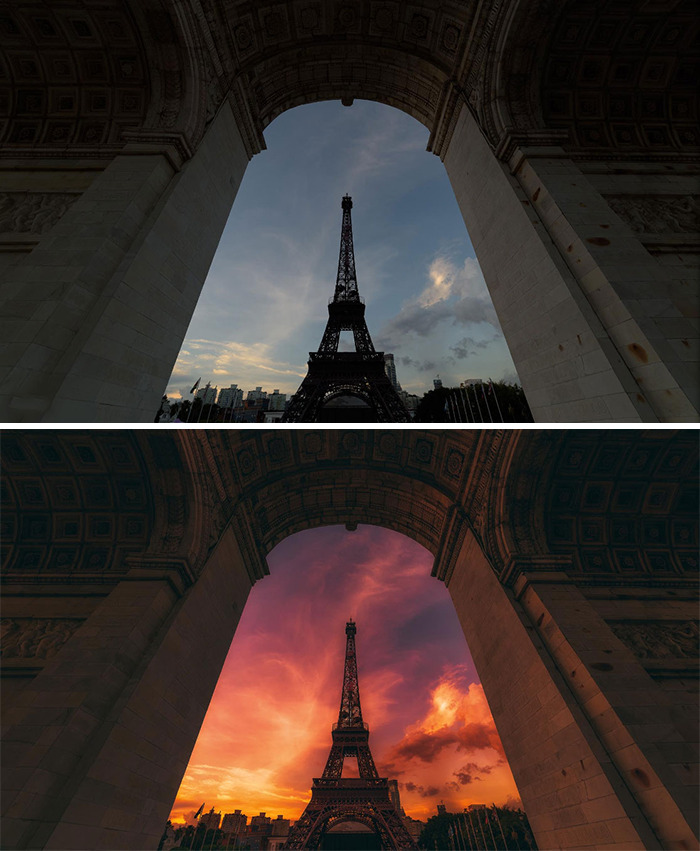
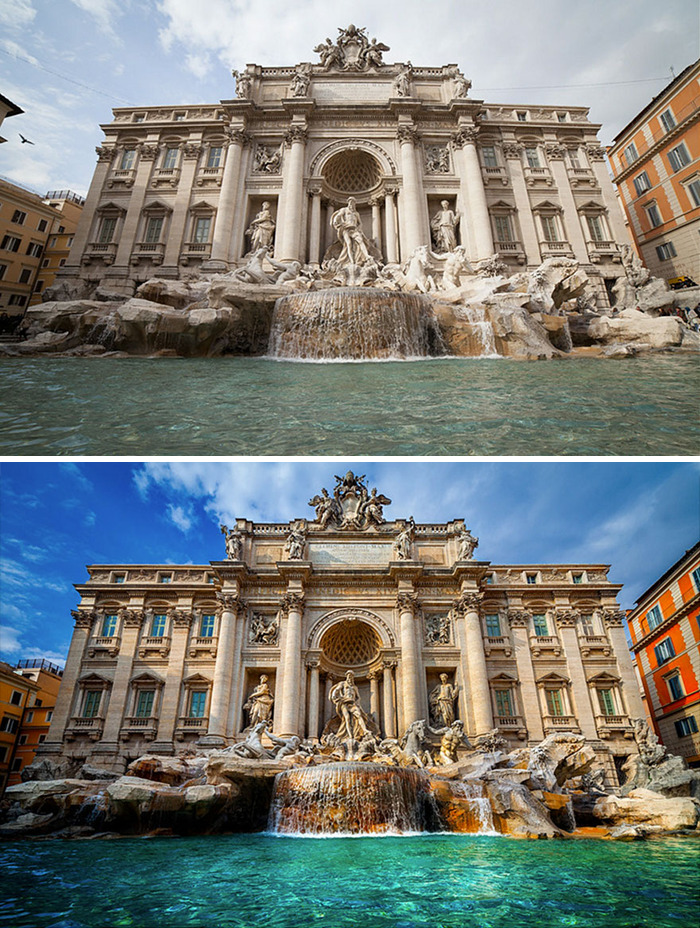
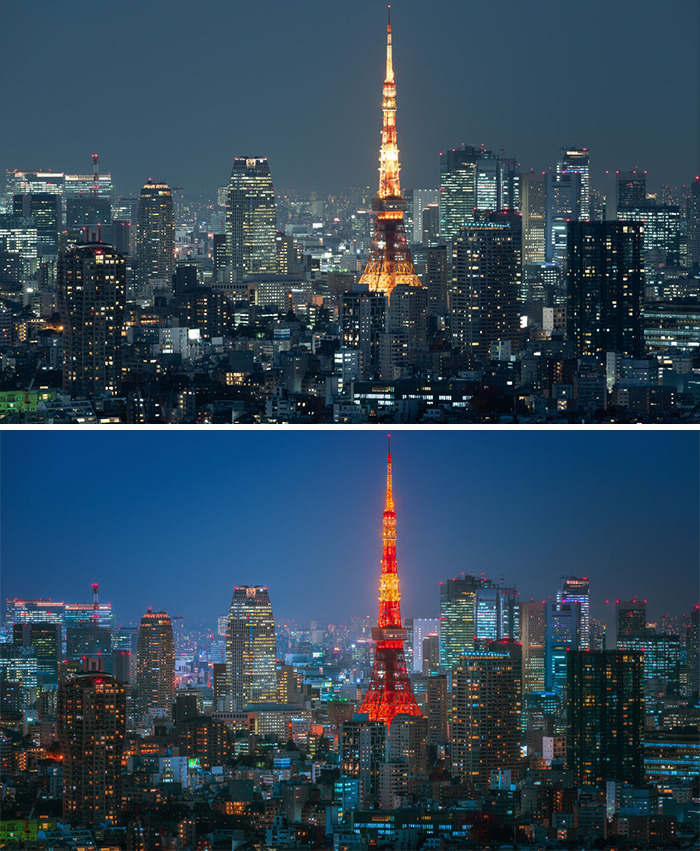
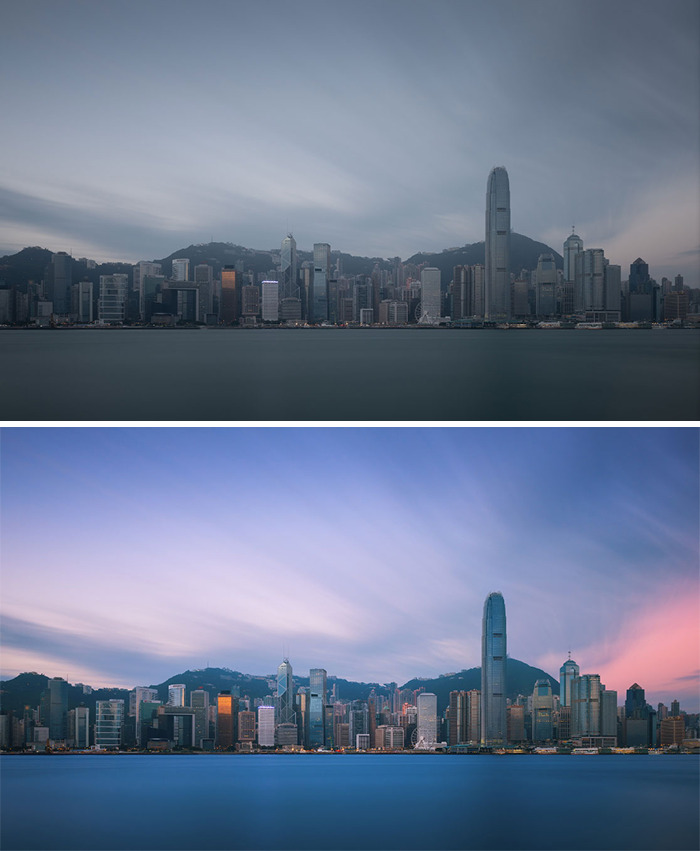
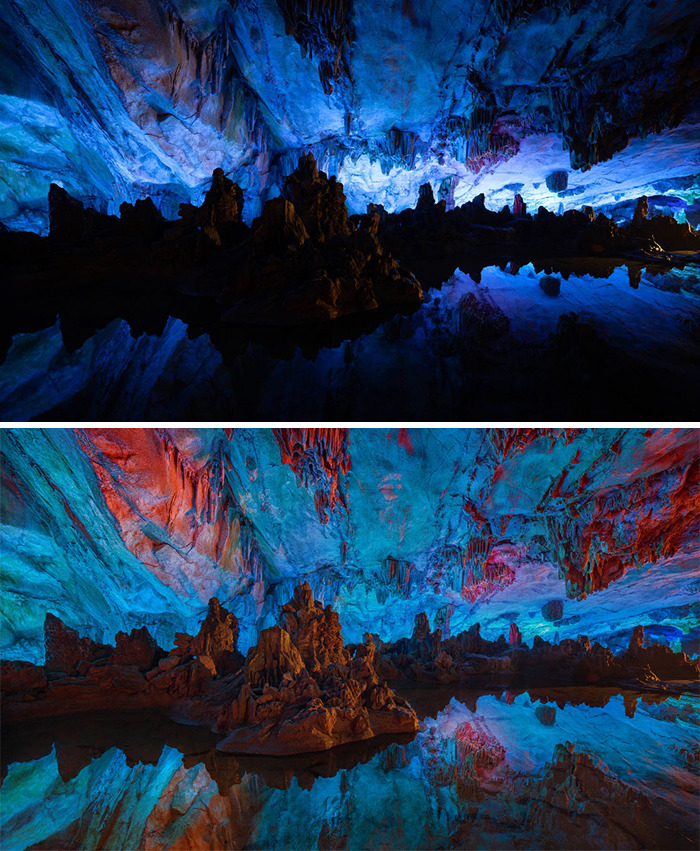
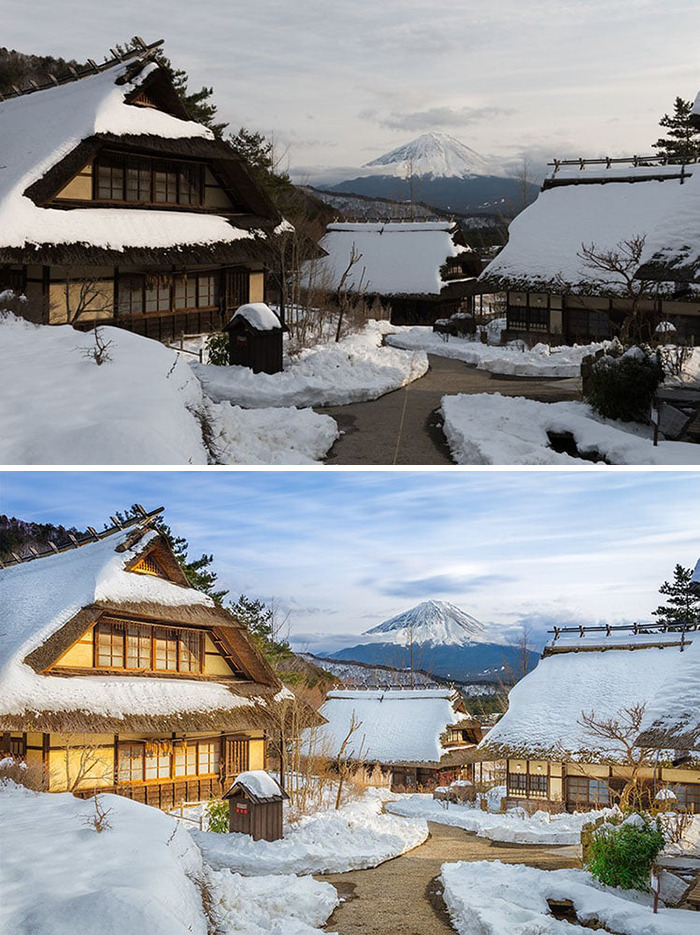
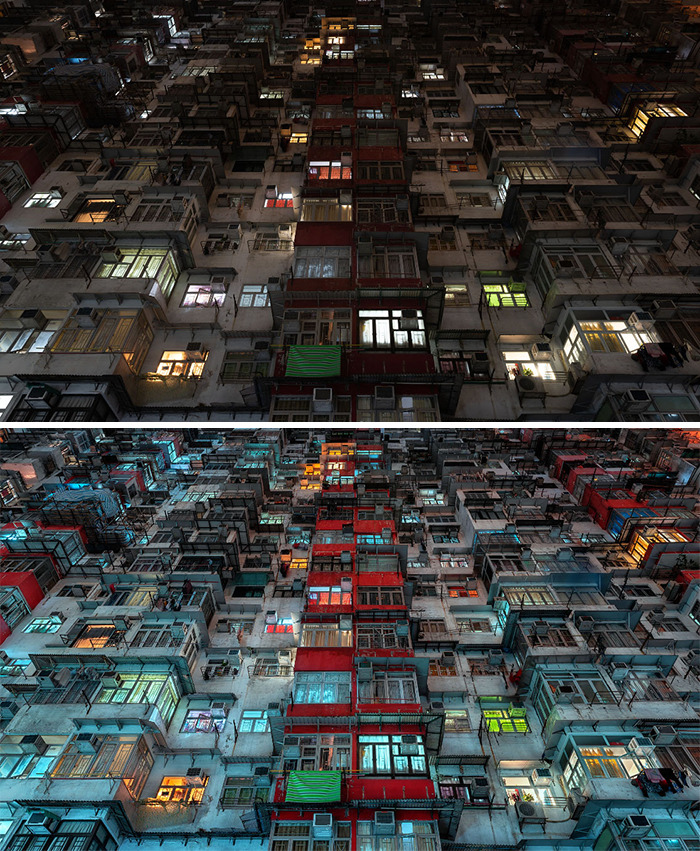
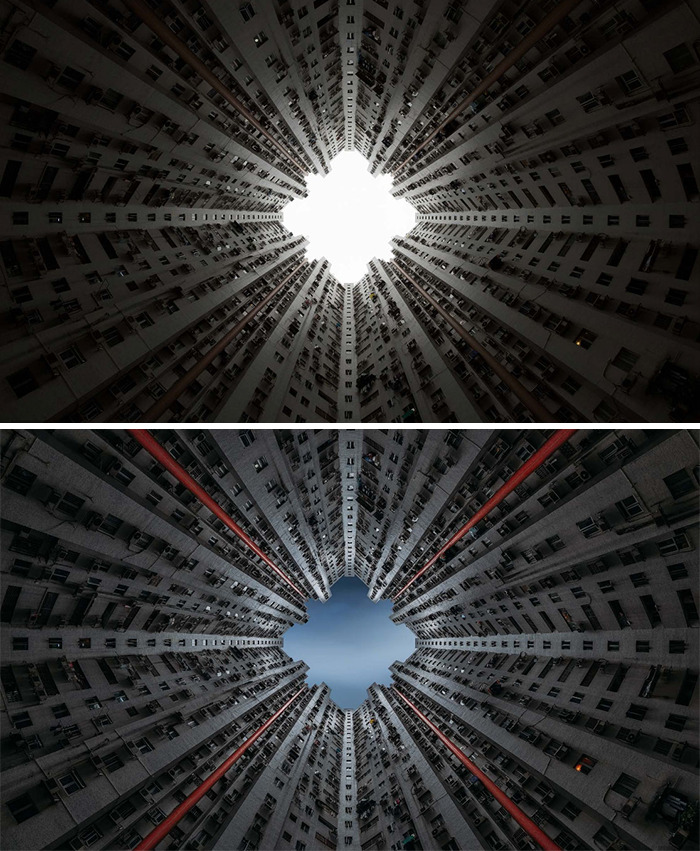
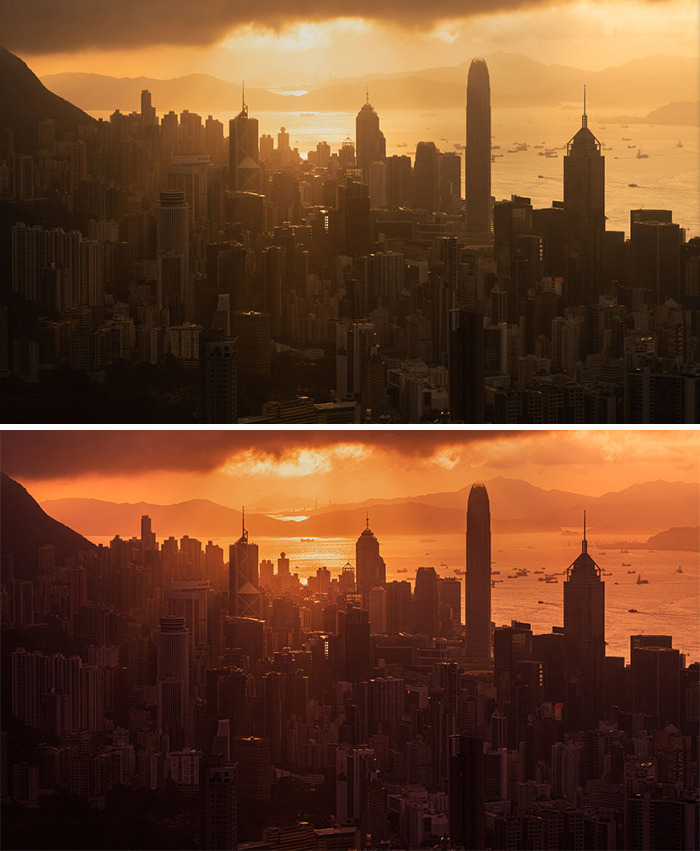
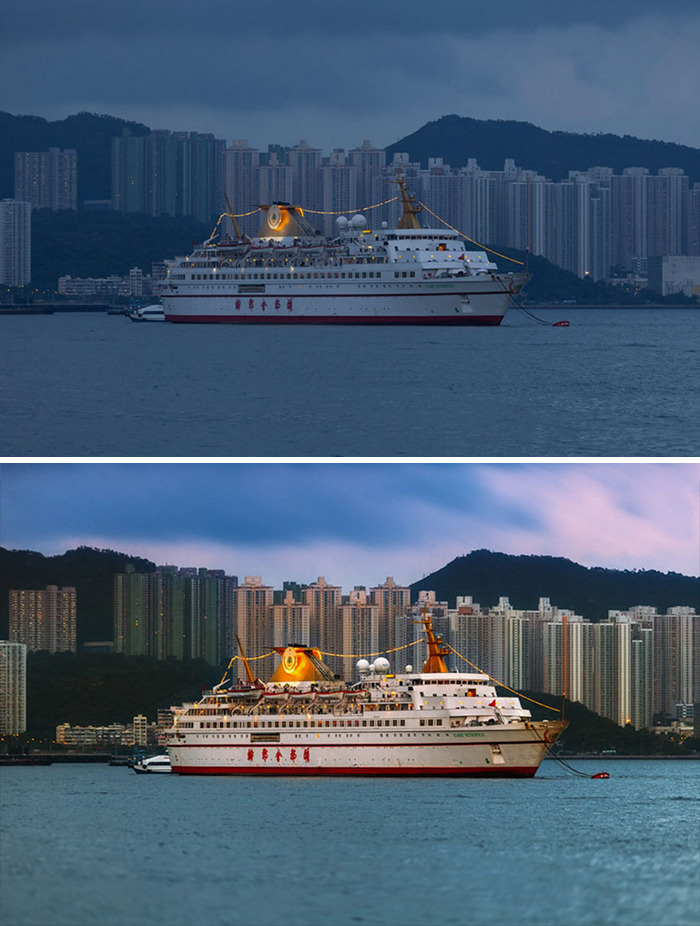
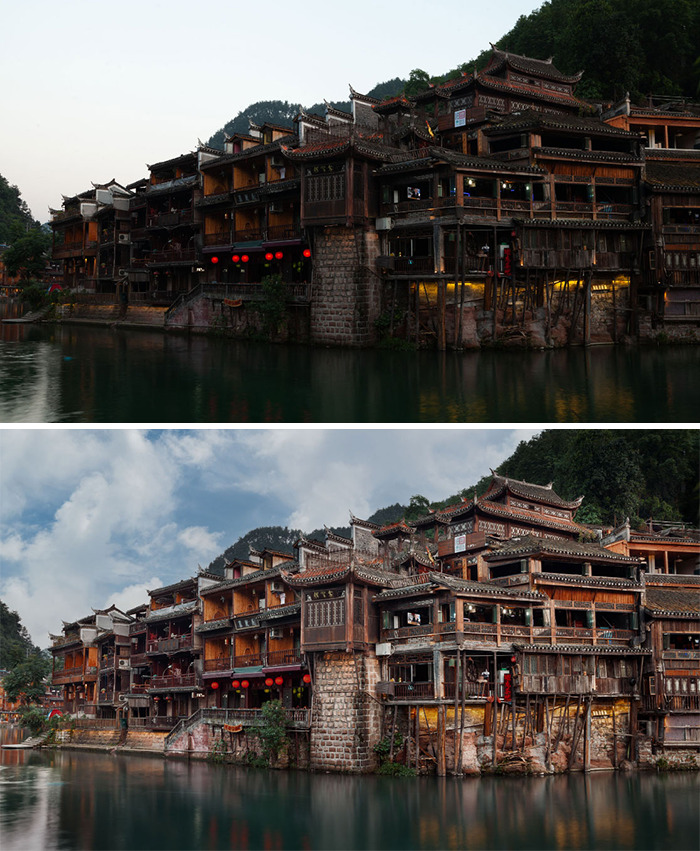
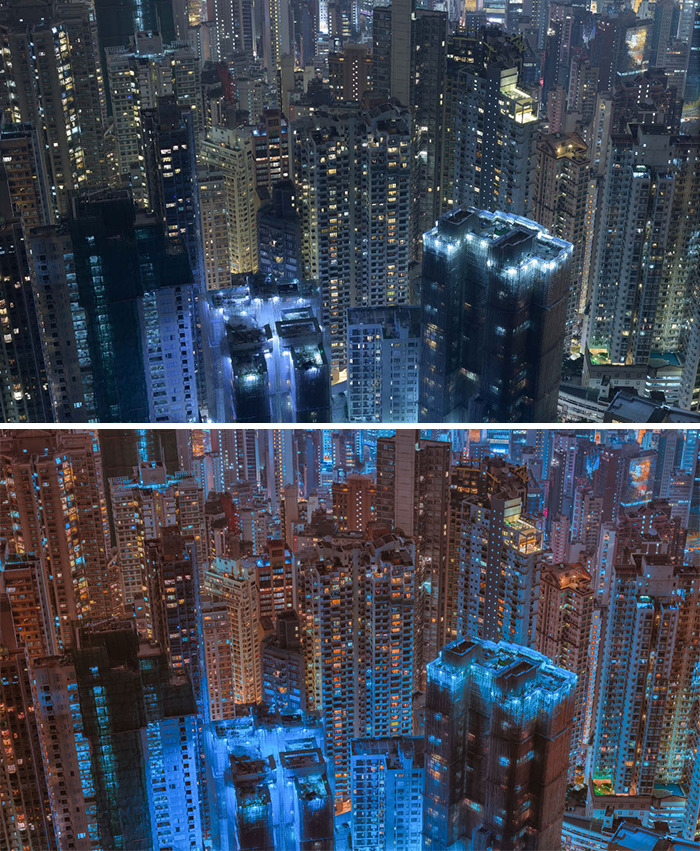
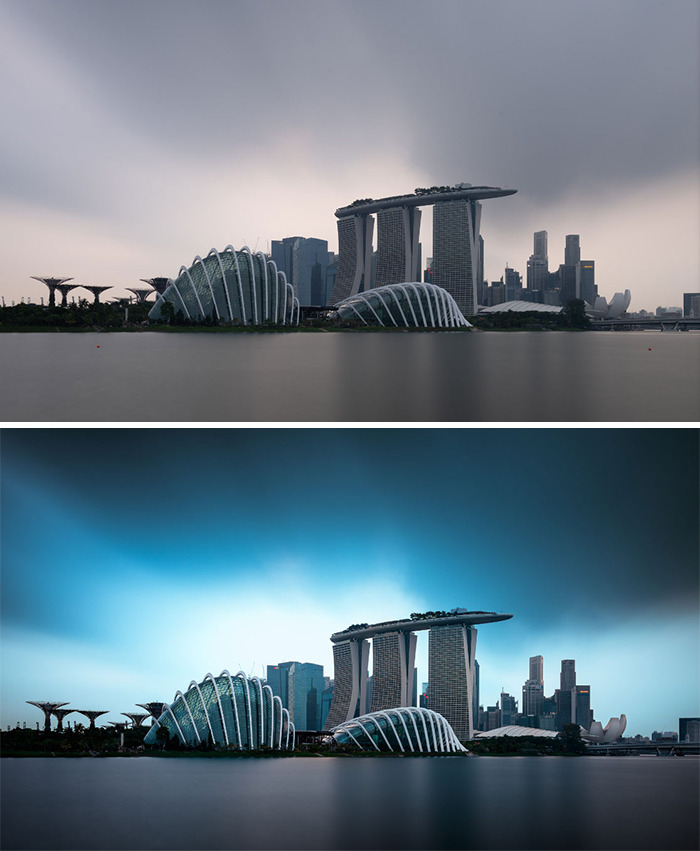
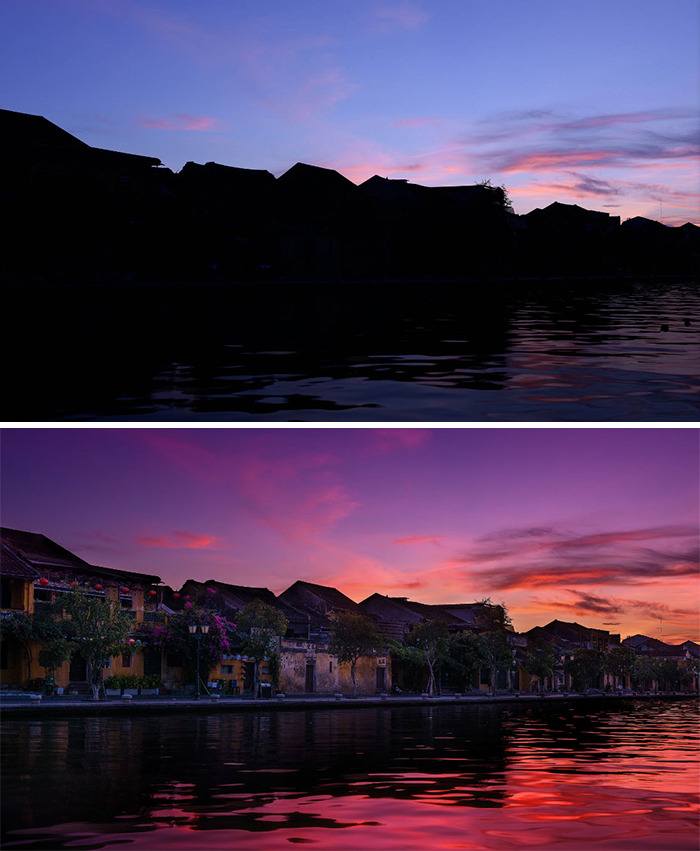
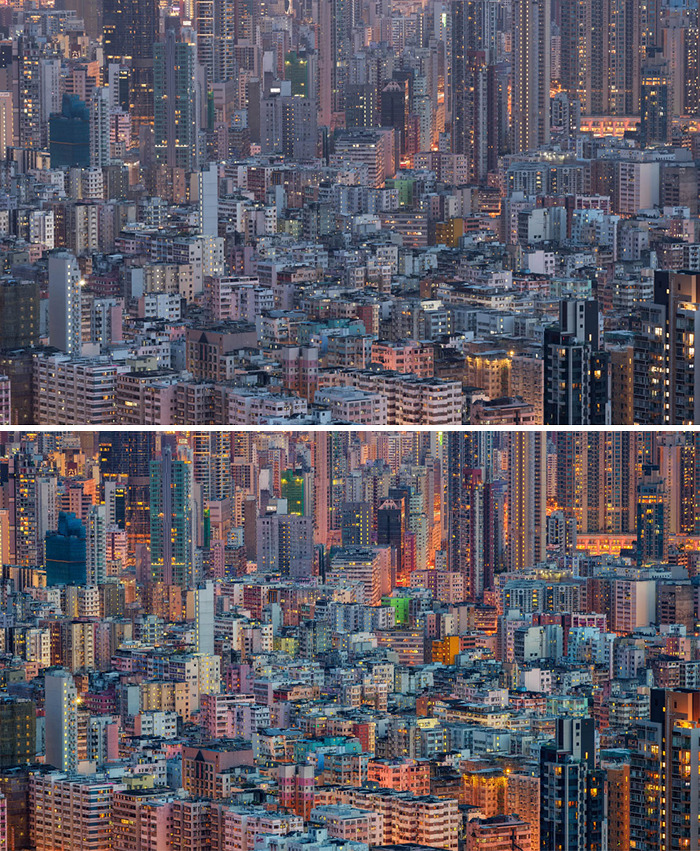
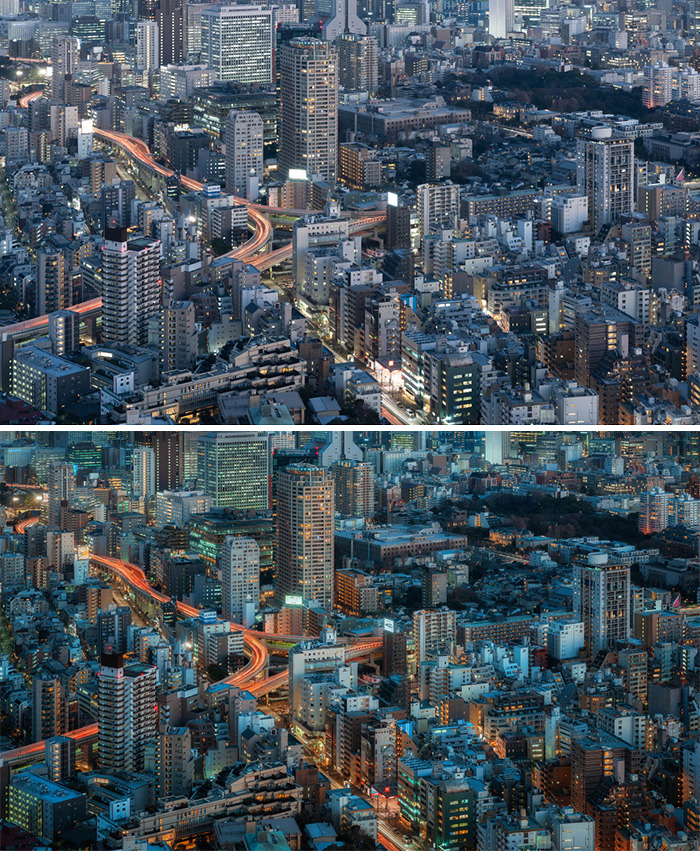
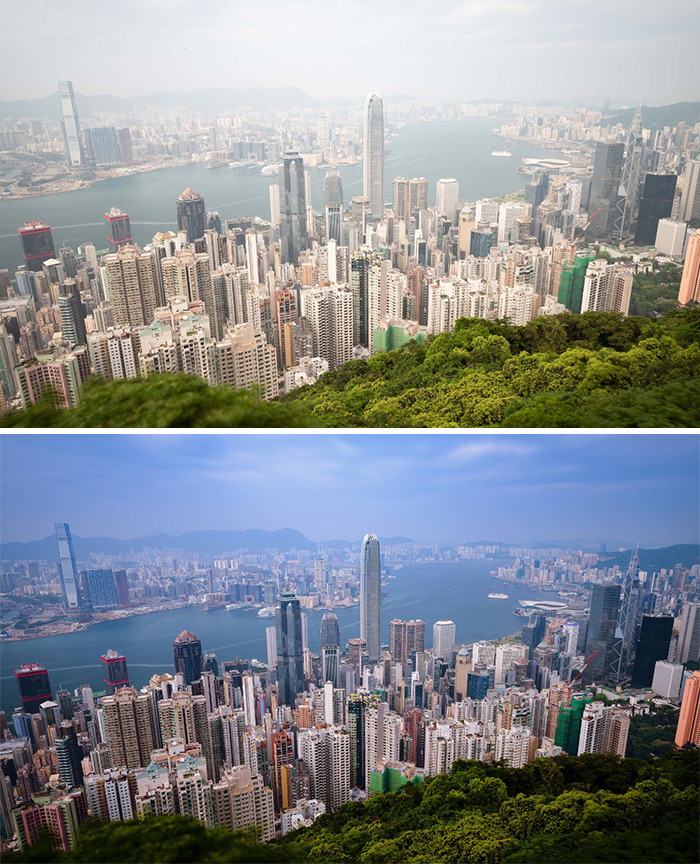
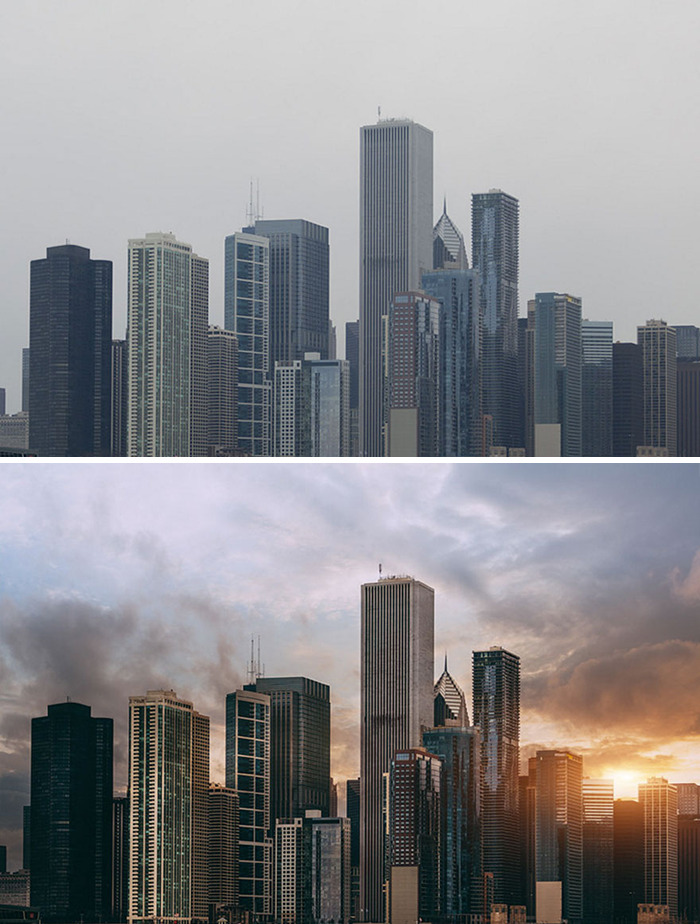
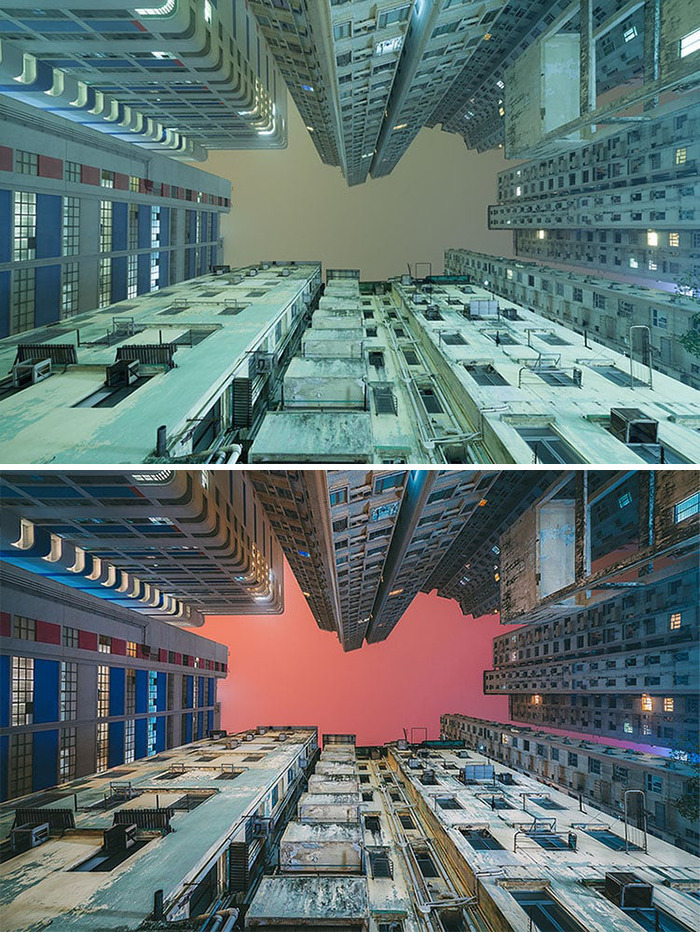
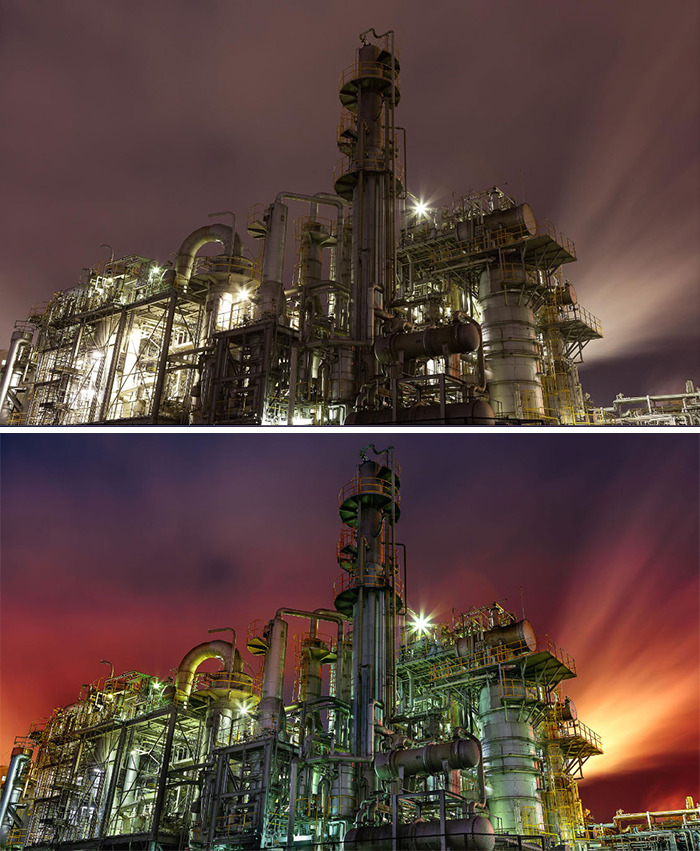
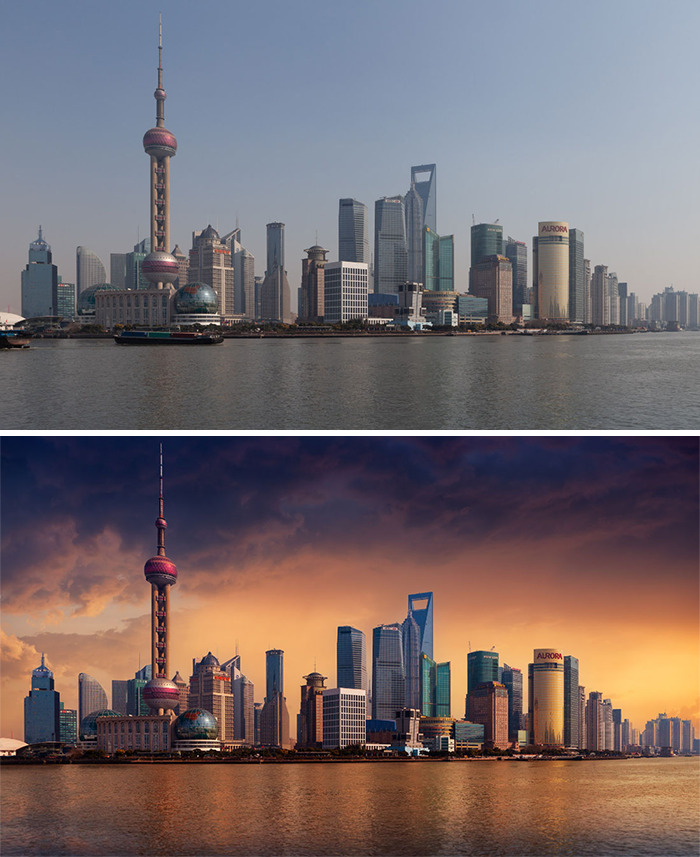
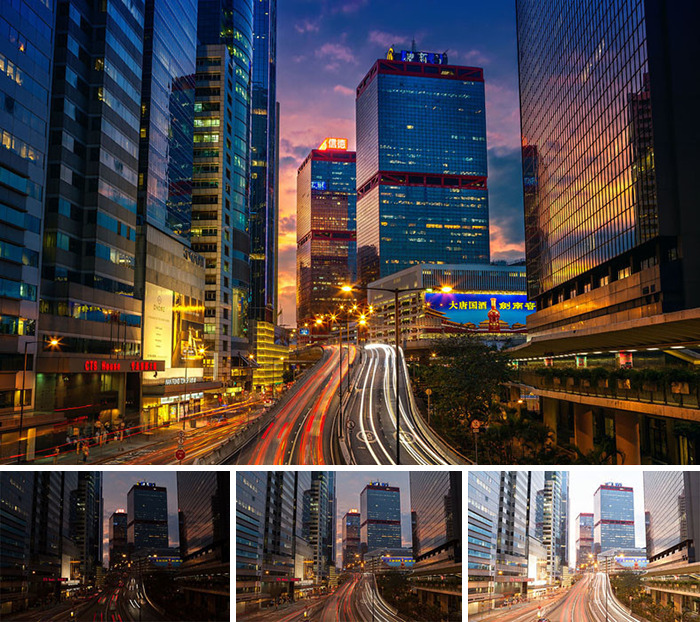
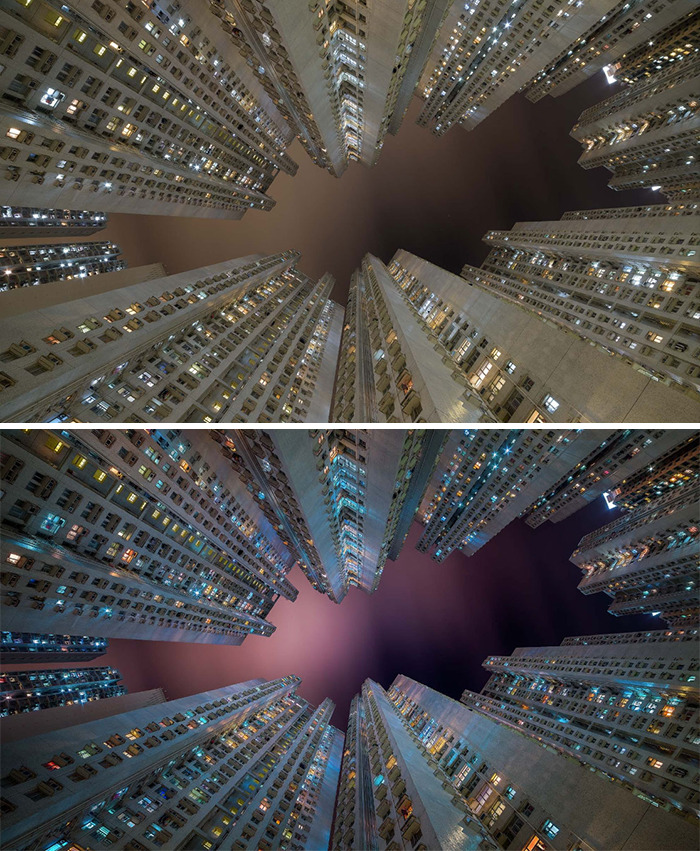
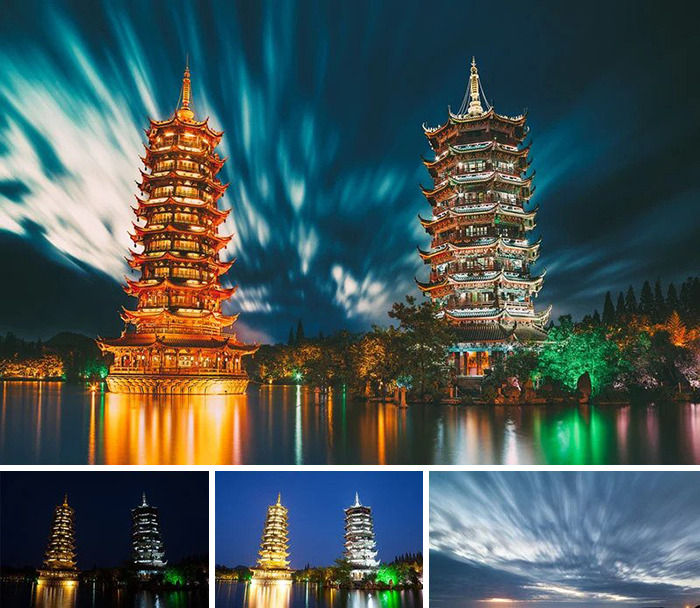
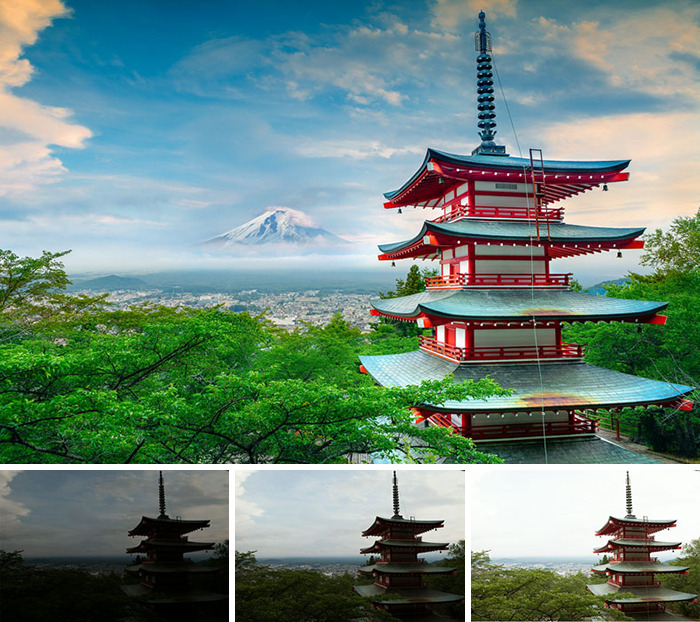
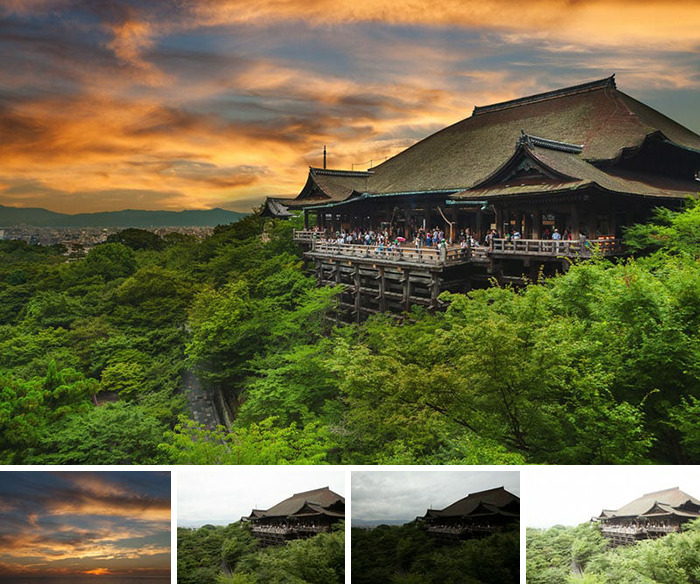
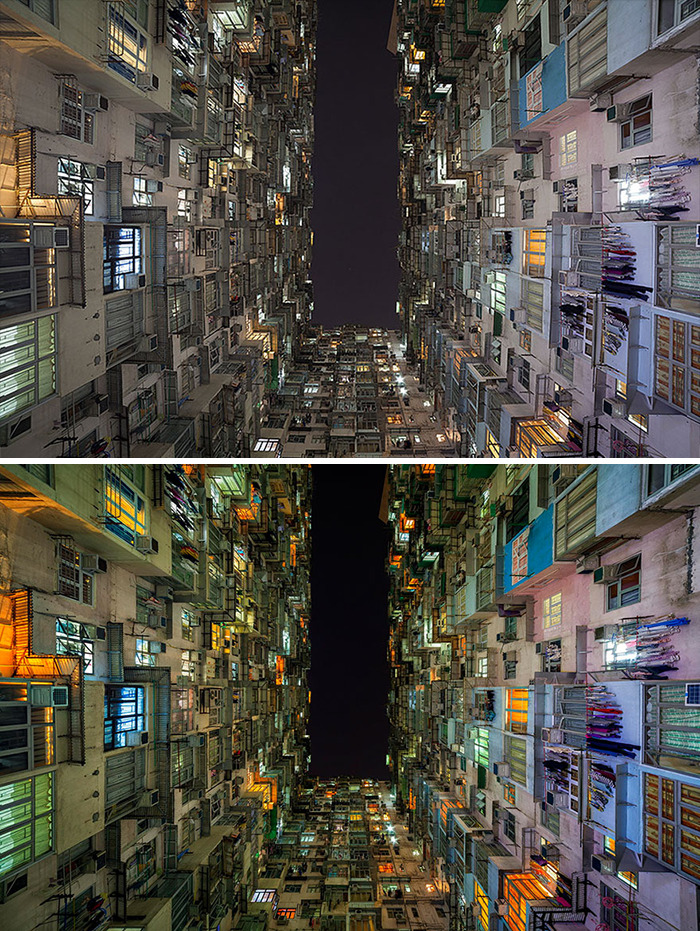
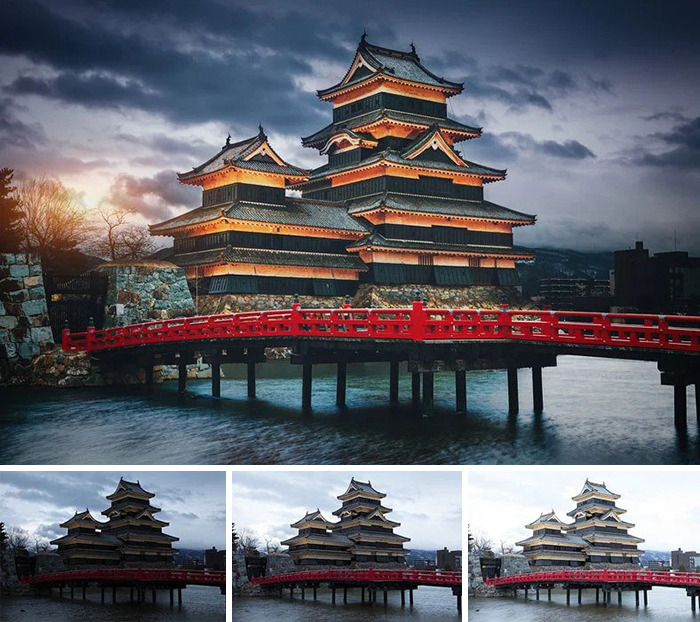
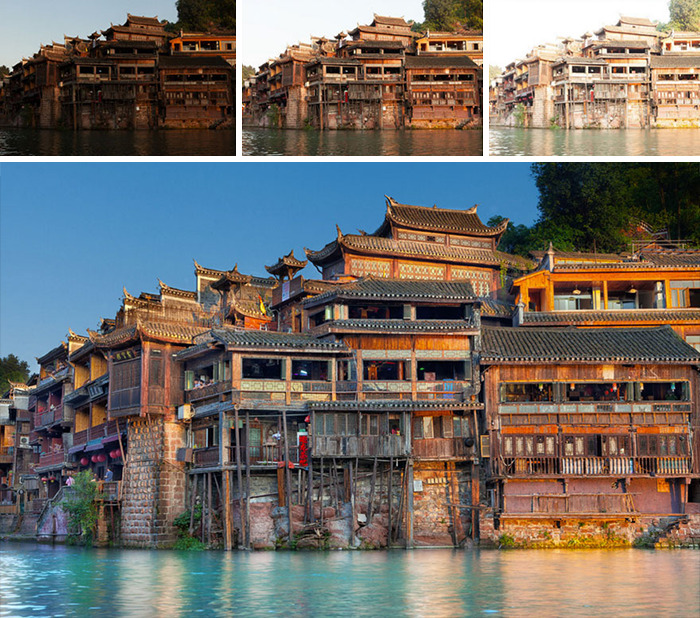
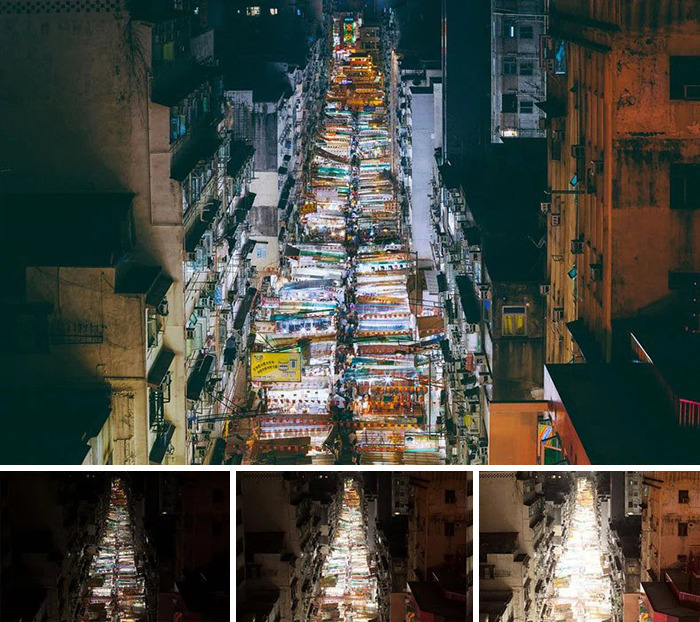
Peter Stewart is an internationally published photographer with thousands of followers and millions of views. He’s also a wizard with Photoshop, and you can see from these revealing before and after pictures just what sort of difference some clever editing can make.
Listen beautiful relax classics on our Youtube channel.
More info: Peter Stewart | 500px | Instagram | Flickr | (h/t: demilked, PetaPixel)
#1
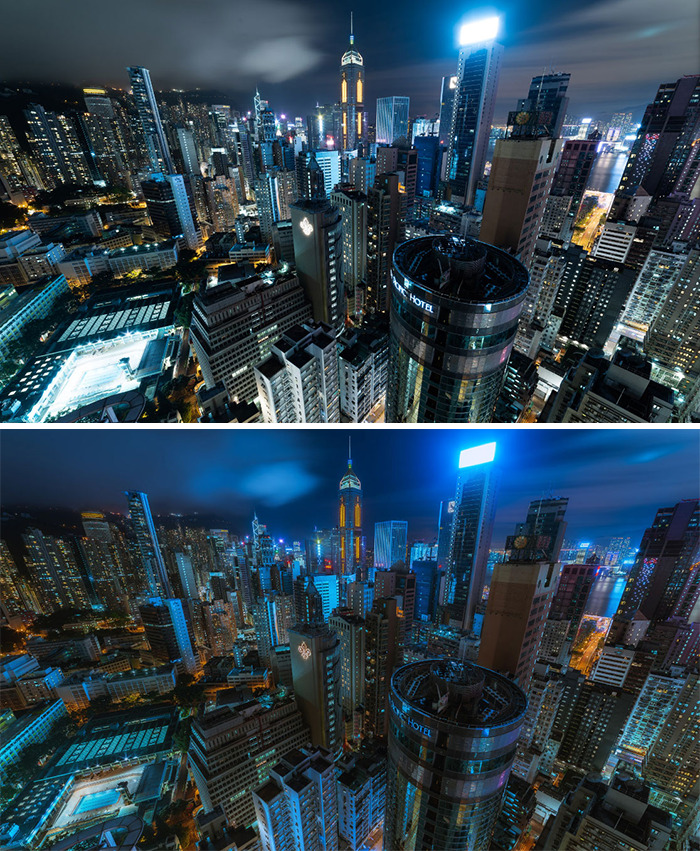
HDR bracketing manually blended in Photoshop. Nik color efex pro used for post-production.
Image credits: petestew
“I like to approach my digital photography with a certain sense of the fantastical and the surreal,” Stewart told PetaPixel. He uses a technique called bracketed multiple exposure, which allows him to retain highlight details from different photographs before stacking them together into one picture.
“These before and after samples are simply meant to highlight what can be done with the power of Photoshop,’ says Stewart. “As such, I have deliberately provided the most dramatic examples.”
#2
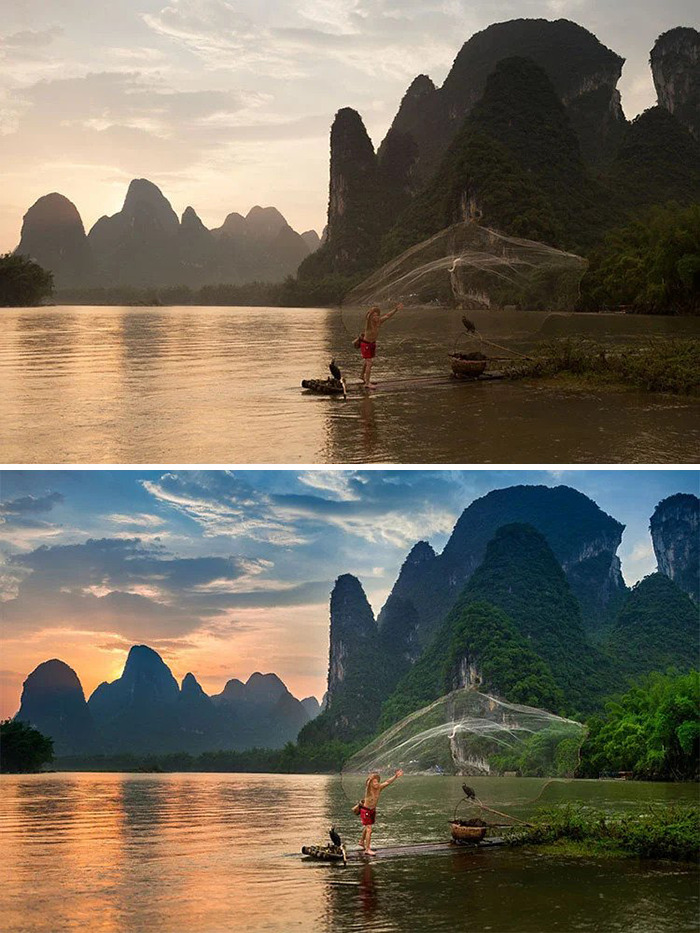
Gradual orange sky gradient and color adjustments were performed in adobe camera raw. Sunrays created in photoshop, with an added glow.
Image credits: petestew
#3
Image credits: petestew
#4
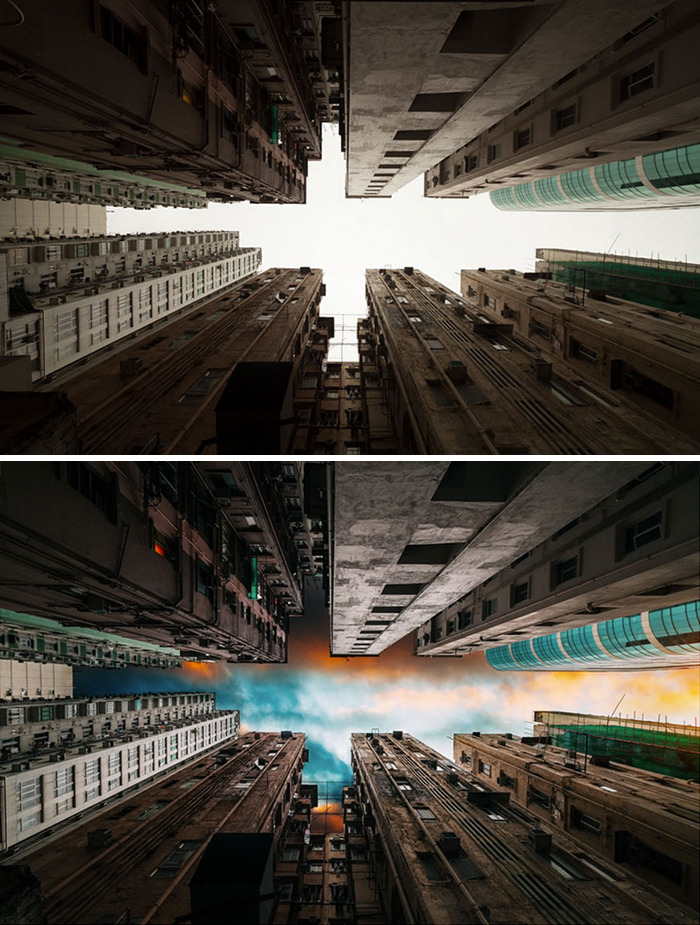
Perspective re-correction and power line removal in photoshop. Color enhancements using color efex pro.
Image credits: petestew
#5
Image credits: petestew
#6
Image credits: petestew
Listen beautiful relax classics on our Youtube channel.
#7
Image credits: petestew
#8
Image credits: petestew
#9
Image credits: petestew
#10
Image credits: petestew
#11
Image credits: petestew
#12
Multiple exposure blended file.
Image credits: petestew
#13
Image credits: petestew
#14
Various sky adjustments were performed in Photoshop. Nik color efex pro was used for post-production color enhancements.
Image credits: petestew
#15
Tonal adjustments were made using nik color efex pro. Composite sky blended into the frame manually.
Image credits: petestew
#16
Image credits: petestew
#17
Image credits: petestew
#18
Image credits: petestew
#19
Image credits: petestew
#20
Nik color efex pro used for post-production color enhancements.
Image credits: petestew
#21
Image credits: petestew
#22
Image credits: petestew
#23
Image credits: petestew
#24
Image credits: petestew
#25
Image credits: petestew
#26
Color temperature adjustment using Adobe Camera RAW.
Image credits: petestew
#27
Image credits: petestew
#28
Overexposed image with detail brought back using camera raw. Nik color efex pro used for post-production color.
Image credits: petestew
#29
Image credits: petestew
#30
Image credits: petestew
#31
Image credits: petestew
#32
Adjustments to contrast and color to reduce haze and ‘warm up’ the image. Composite sky blended into the frame, with sun glow added in.
Image credits: petestew
#33
Contrast and color temp corrected. Color enhancements made using vsco and nik color efex pro.
Image credits: petestew
#34
3x exposure edit. HDR bracketing manually blended in Photoshop. Nik Color Efex Pro used for post-production color enhancements.
Image credits: petestew
#35
Image credits: petestew
#36
HDR bracketing manually blended in photoshop. Nik color efex pro used for post-production.
Image credits: petestew
#37
Image credits: petestew
#38
2x exposures manually blended in Photoshop. Perspective fixed in camera raw. Color adjustments made using Nik color efex pro.
Image credits: petestew
#39
HDR bracketing composited using photoshop’s ‘merge to HDR’. Nik color efex pro used for post-production
Image credits: petestew
#40
3x exposures manually composited in photoshop cc. Replacement sky layer manually overlaid and ‘painted’ in.
Image credits: petestew
#41
Single raw image copied twice then flipped and cut diagonally, then masked to create a seamless join. The image was then brightened to reveal detail.
Image credits: petestew
#42
Single exposure edit.
Image credits: petestew
#43
Hdr bracketing manually blended in photoshop. Nik color efex pro used for post-production.
Image credits: petestew
#44
Hdr bracketing manually blended in photoshop. Nik color efex pro used for post-production color enhancements.
Image credits: petestew
#45
Single exposure composite cropped and color corrected in photoshop. Sky background composited into image and color corrected.
Image credits: petestew
#46
3x exposure edit. HDR bracketing manually blended in Photoshop. VSCO film presets used for color enhancement.
Image credits: petestew
Source: boredpanda.com
